
How to Cut to a Design in TX73
1. Select the design element you want to stake out
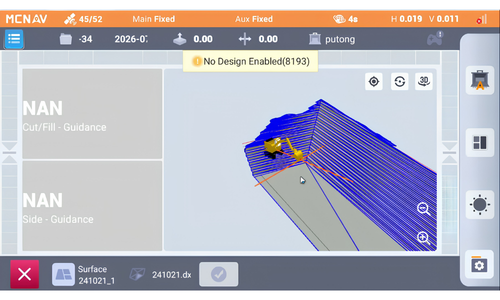
The screen may show data, but no cut/fill values will appear until a design element is enabled.
To begin staking out, click the element you want to use directly on the screen.
In the example, the surface is selected and turns blue to confirm it is active.
The bottom panel shows the selected surface name and the file it comes from.
2. Enable the selected surface to display cut/fill values
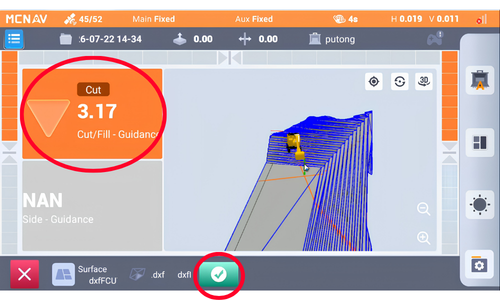
After selecting the surface, click the tick/check box in the bottom panel.
This activates the surface for stakeout.
If the bucket is positioned over or below the surface, the system displays the cut value to the surface.
A line from the bucket also appears to show the measurement reference point.
3. Enable a string to stake out

You can stake out a string in addition to the surface.
Click the string on the screen to select it.
The bottom panel will show details such as:
Name of the string
Height
URL
File source
Layer
Tick the checkbox to activate the string.
The system then shows the horizontal offset to the string as well.

Turn off a guide element when you no longer need it
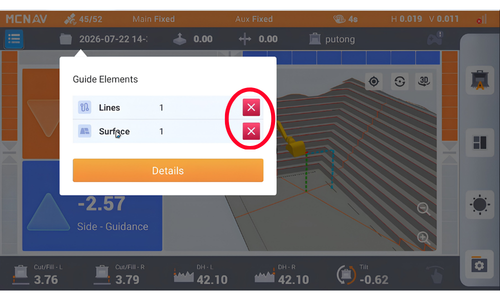
If you want to stop staking out a line or guide, go to the project folder.
You will see the selected guide elements listed there.
Turn off the line you no longer want active.
The system will return to showing only the remaining active element, such as the surface.
5. Choose where the bucket measurement is taken from
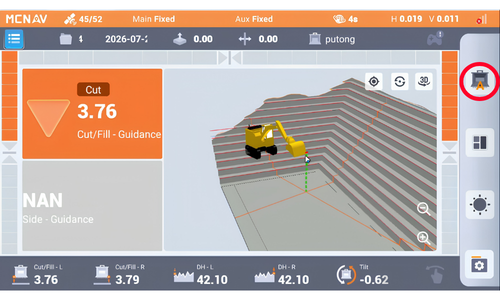
The measurement point on the bucket matters for stakeout readings.
You can set it to measure from the:
Left side
Middle
Right side
Automatic
In Automatic mode, the software uses the closest point of the bucket to the target.
When the bucket tilts or moves, the reference point updates automatically.