
How to Add & Configure Buckets
1. Open the bucket configuration menu
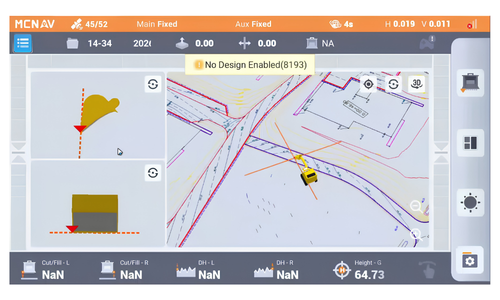
From the main menu, go to Config → Buckets.
This is where you manage bucket profiles for the machine.
Important: whenever you change buckets on the machine, you must also update the bucket on the software so the coordinates stay accurate.
2. Review existing buckets or create a new one
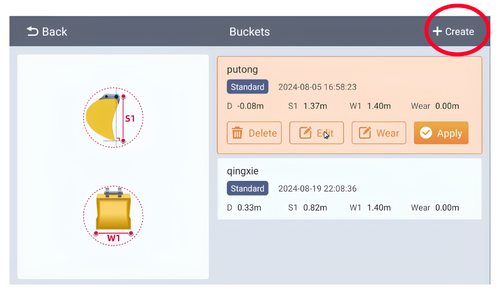
You’ll see any buckets that have already been added.
You can either:
Edit an existing bucket, or
Create a new bucket profile.
When creating a new one, give it a clear name that is easy to identify.
3. Enter the bucket dimensions
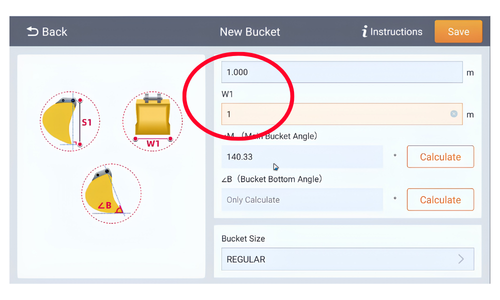
For s standard bucket, measure the bucket dimensions using a tape measure and enter them into the S1 & W1 fields.
Key fields include:
S1 = height from the tip of the bucket to the pin
W1 = width
In the example, both measurements are set to 1 meter.
4. Calculate the bucket angle
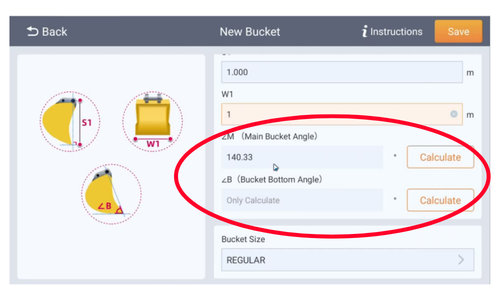
Use the bucket angle calculation to define the bucket’s position.
For the S1 angle:
Attached the bucket to the machine and position the bucket so that the S1 line is vertically plumb.
Use a plumb bob to make sure it is perfectly vertical.
Click Calculate to generate the angle (Main Bucket Angle).
For the B angle:
Sit the bottom of the bucket flat on the ground.
Click Calculate again to determine that angle.
5. Choose the correct bucket size type
Select whether the bucket is:
Standrard, or
Custom
Use Custom if the bucket is trapezoid-shaped or has a smaller bottom than the top.
Custom buckets require extra measurements so the software can calculate the correct geometry.
6. Use the built-in instructions if needed
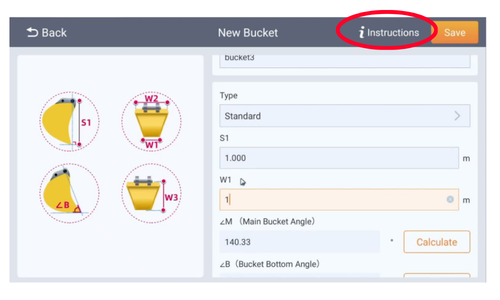
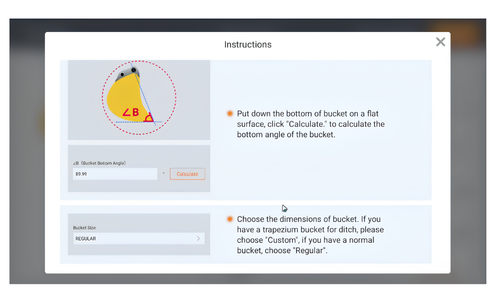
Click Instructions for a built-in guide.
The instructions explain:
What measurements to take
How to position the bucket
How to calculate the angles
This is useful if you need a reminder while entering a new bucket profile.
7. Save the new bucket profile
Click Save after entering all measurements and calculations.
The new bucket will now appear in the bucket list.
8. Apply the bucket to make it active
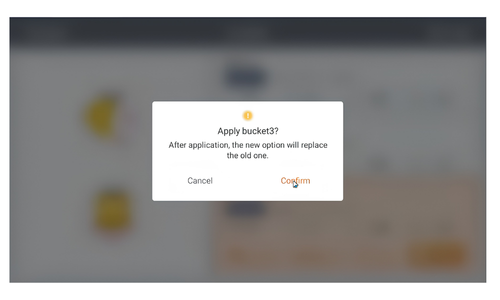
Select the new bucket from the list.
Click Apply.
Confirm the action when prompted.
A star appears next to the bucket name when it is active.
The active bucket is now loaded on the machine and used for coordinate calculations.
9. Reapply the old bucket when switching back
If you switch back to a previous bucket, you must apply that old bucket again.
This ensures the software matches the bucket currently installed on the machine.