
How to Customise Your Display in CHCNAV TX73
Watch the video or follow the step by step guide below:
1. Cycle through preset display layouts
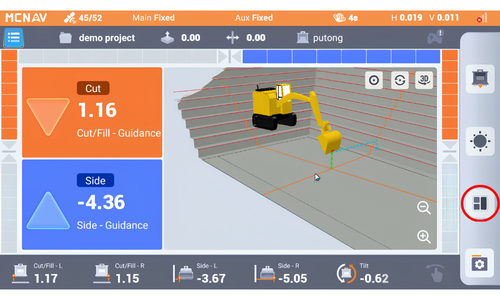
Use the three-squares icon on the quick access bar to switch between preset screen layouts.
Each click cycles to the next saved view.
The default setting is three different layouts presets.
Open the view editor to customize layouts
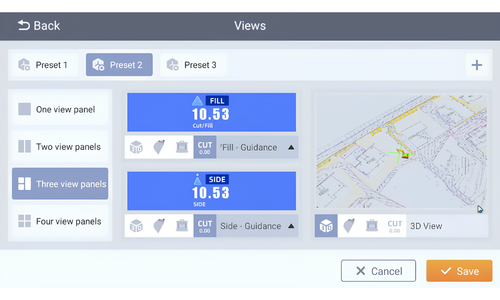
Click and hold the three-squares icon to open the view editor.
From here, you can:
view the existing presets
add more presets, up to five total
modify each preset layout
You can choose different panel arrangements, such as:
single panel
double panel
three-panel
four-panel
You can also choose what each panel displays, including cut/fill, side guidance, bucket profiles and 3D view
Save the layouts once it is set up the way you want.
3. Customize the bottom information panel
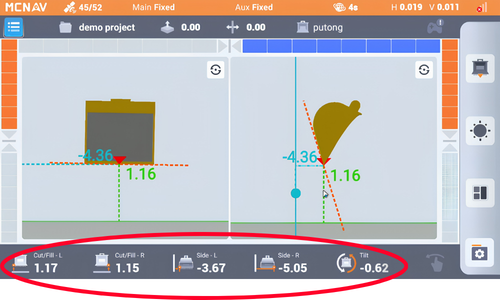
The bottom bar is the information panel.
It can show items like:
cut/fill to design
horizontal offset to design
design heights
bucket information – coordinates, tilt angle, rotate
machine pitch and roll
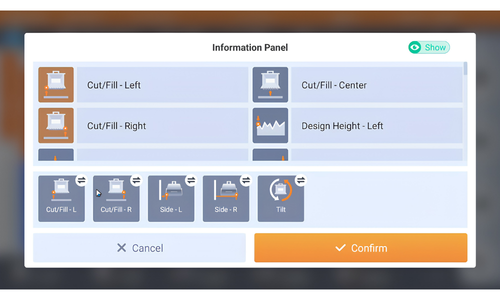
Click and hold the bar to open its editor.
Add or remove any data you want to show or hide.
After confirming, you can scroll left to right through the added values.
You can also turn the bar off completely by disabling the show option.
4. Use and configure the light bars
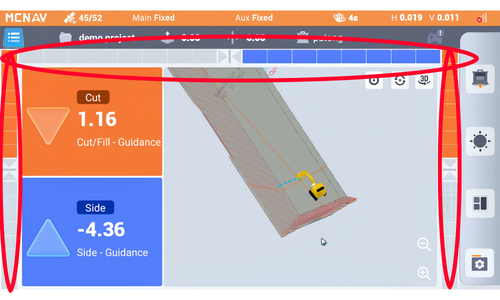
The light bars appear along the sides and top of the display.
They act as visual indicators of how close you are to the design target.
As the bucket moves closer to the target:
the bars shrink or disappear when you reach the correct height
the horizontal indicators change as you move toward the staking line
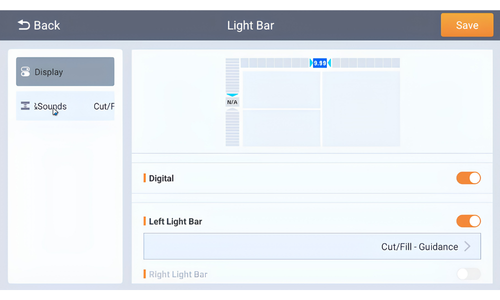
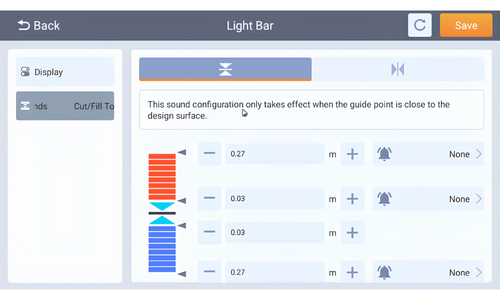
Click and hold the light bars to edit them.
You can:
turn individual bars on or off
add a digital indicator with numeric cut distance
change the bar scale, such as setting it to 1 meter
set alarms for conditions like cutting below the surface
If you prefer, you can disable all light bars and rely on other display methods instead.
Choose the display style that works best for you
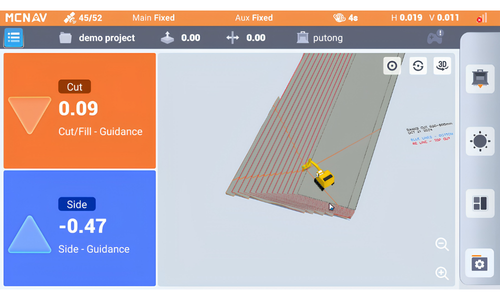
The TX73 display is flexible, so you can keep it minimal or make it information-heavy.
The best setup depends on your preference and how much detail you want visible while working.
You can use:
clean views with fewer indicators
detailed views with multiple bars and readouts
6. Toggle dark mode
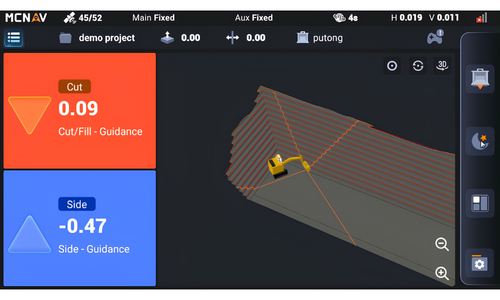
Use the dark mode button on the quick access bar to switch the interface appearance.
This is a simple on/off display preference.
7. Edit the quick access bar
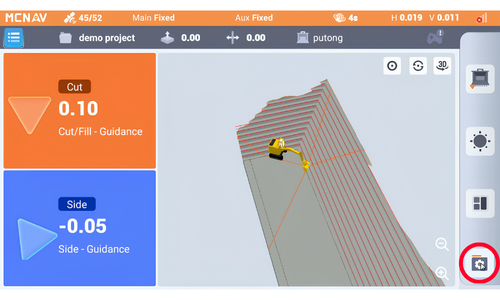
Click the settings icon on the quick access bar to open more options.
From there, you can:
select additional tools or buttons
add buttons to the quick access bar by dragging and dropping them onto the quick access bar
remove buttons you no longer want there
The quick access bar can hold a limited number of shortcuts, so you can tailor it to the functions you use most often.