
How to Create a Project & Set Coordinate System in CHCNAV TX73
Watch the video or follow the step by step guide below:
1. Open the Projects area.
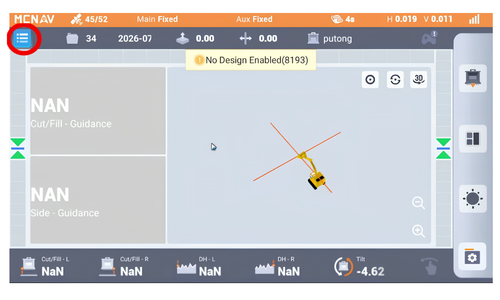
From the main menu, go to Common > Projects.
This is where you can view all existing projects and start a new one.
2. Create a new project.
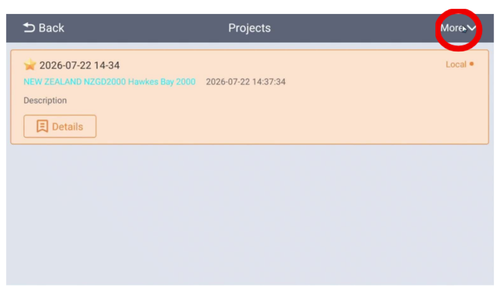
Click More > Create New Project.
Enter a project name.
The project will use the last-used coordinate system by default, so only change it if needed.
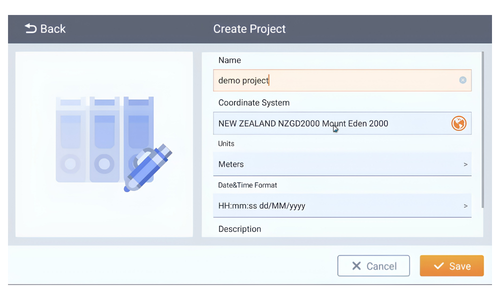
3. Select the correct coordinate system.
If the current coordinate system is already correct, leave it as is.
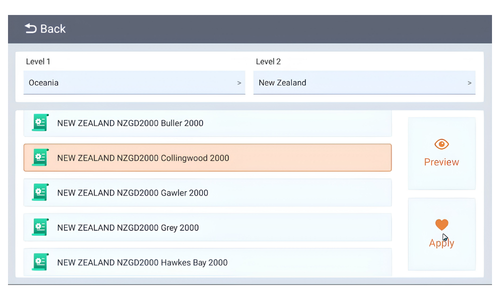
To change it, click inside the coordinate system selection box, go to More > From Library and choose the coordinate system from the list.
If it is not available in the library, go to More > Preset.
Set your country.
Select the correct coordinate system from the available list.
Click Apply.
Once it appears in the library list, select it and click Accept.

4. Confirm vertical adjustment settings.
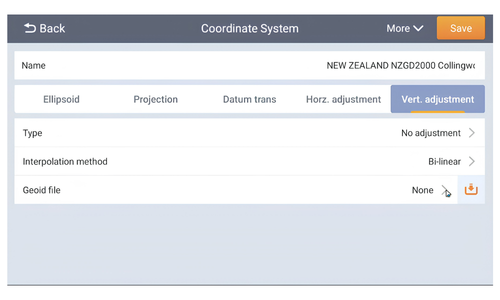
Open the Vertical Adjustment tab.
Make sure a geoid file is selected.
The typical file used is NZ Geoid 2016 but always confirm the project datum requirements.
Save the vertical adjustment settings.
5. Review project settings and save
Confirm the units are set to meters.
Check the date and time format and change it if needed.
Add a description if desired.
Click Save.
A star next to the project indicates it is now the active project.

6. Return to the main screen.

Go back to the main screen.
The active project name should now appear at the top of the screen next to the folder symbol.